CentOS 7.9 Networking: ifcfg, nmcli, and Migration Precautions
EdwardMoon
Treat CentOS 7.9 network configuration as part of recovery and migration for existing servers. CentOS Linux 7 reached end of support on June 30, 2024; use a supported Rocky Linux or RHEL release for new production servers and manage networking through NetworkManager connection profiles. This guide corrects mismatched IP/broadcast examples and covers backup, application, validation, and recovery while protecting remote access.
These examples use the documentation range 192.0.2.0/24. Replace the IP, prefix, gateway, DNS, and interface name with real values before applying them. First confirm that a console or remote management card provides a recovery path.
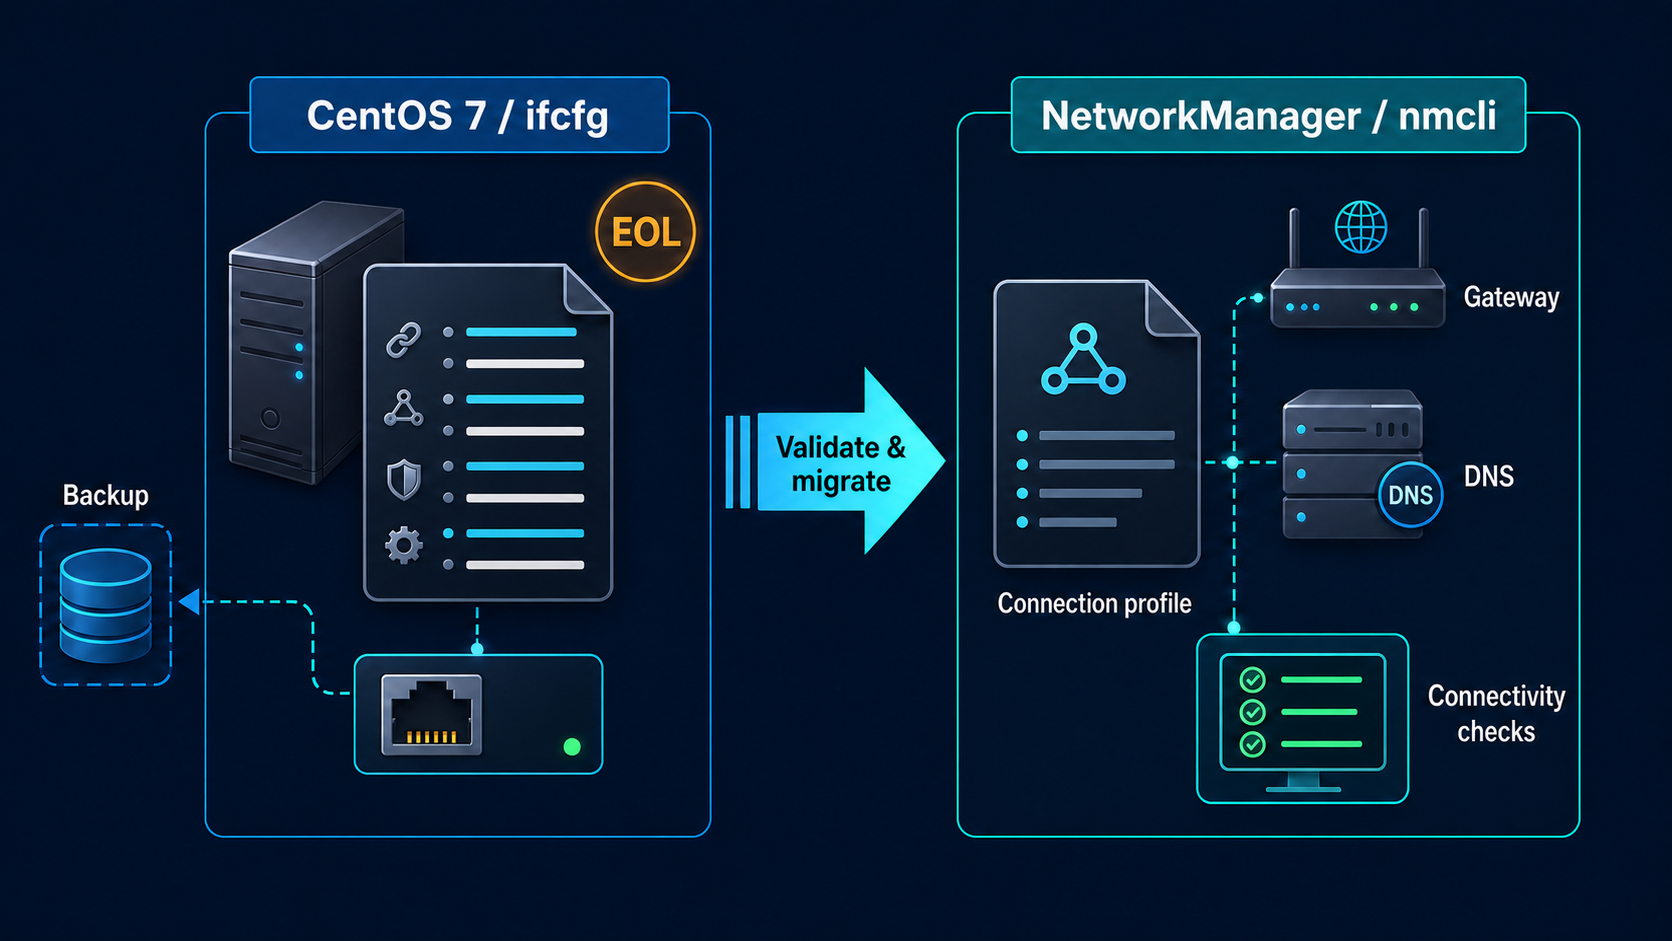
Check End-of-Life Status and Change Scope
CentOS 7 Vault archives old packages; it does not restore security support. Isolate internet-facing servers and migrate their assets and data to a supported OS after restoring networking.
Identify what currently manages the connection: NetworkManager or legacy network-scripts. Record the default route, DNS, and actual interface names so recovery does not depend on guesswork.
cat /etc/centos-release
systemctl is-active NetworkManager
nmcli general status
nmcli device status
nmcli connection show
ip -br address
ip route show
cat /etc/resolv.conf
Back Up Configuration and Secure Remote Recovery
Applying network changes directly over SSH can disconnect you. Verify console access first, then preserve network configuration, routing, and DNS output. Include NetworkManager profiles in the same backup.
STAMP=$(date +%Y%m%d-%H%M%S)
sudo install -d -m 0700 "/root/network-backup-${STAMP}"
sudo cp -a /etc/sysconfig/network-scripts   "/root/network-backup-${STAMP}/"
nmcli -f all connection show   | sudo tee "/root/network-backup-${STAMP}/nmcli-connections.txt" >/dev/null
ip address show   | sudo tee "/root/network-backup-${STAMP}/ip-address.txt" >/dev/null
ip route show table all   | sudo tee "/root/network-backup-${STAMP}/ip-route.txt" >/dev/null
cat /etc/resolv.conf   | sudo tee "/root/network-backup-${STAMP}/resolv.conf.txt" >/dev/null
Legacy ifcfg Files
Use this format only when the existing CentOS 7.9 server still reads ifcfg files. The address and gateway belong to the same example 192.0.2.0/24 network; do not mix incompatible address and broadcast ranges. With a CIDR prefix, the BROADCAST value can usually be omitted.
TYPE=Ethernet
BOOTPROTO=none
NAME=ens192
DEVICE=ens192
ONBOOT=yes
IPADDR=192.0.2.10
PREFIX=24
GATEWAY=192.0.2.1
DNS1=192.0.2.53
DEFROUTE=yes
IPV6INIT=yes
The filename and DEVICE must match the actual interface. On multi-NIC systems, inspect DEFROUTE and route files to prevent unintended competing default routes. Design policy routing separately if required.
# Edit only the required settings without clearing the existing file.
sudoedit /etc/sysconfig/network-scripts/ifcfg-ens192
sudo chown root:root /etc/sysconfig/network-scripts/ifcfg-ens192
sudo chmod 0600 /etc/sysconfig/network-scripts/ifcfg-ens192
sudo grep -Ev '^(#|$)' /etc/sysconfig/network-scripts/ifcfg-ens192
Apply the Target Profile Safely
Use the following nmcli procedure only when NetworkManager is running and manages the target interface. Verify that nmcli device status does not show ens192 as unmanaged. If the server uses only legacy network-scripts, do not run the nmcli application commands; use the target interface’s ifdown/ifup procedure from the console. Do not mix both managers on one interface.
Do not restart the entire network service or NetworkManager on a remote server. Secure a change window and console first, then activate only the target connection. Keep the existing SSH session open until a new session is verified.
sudo nmcli connection reload
nmcli connection show
sudo nmcli connection up ens192
Configure a NetworkManager Profile with nmcli
Rocky Linux 9 and RHEL 9 use NetworkManager connection profiles as the standard. These commands select an existing profile by name and update its static IPv4 address, gateway, and DNS together.
CON='System ens192'
sudo nmcli connection modify "$CON"   ipv4.method manual   ipv4.addresses 192.0.2.10/24   ipv4.gateway 192.0.2.1   ipv4.dns 192.0.2.53   ipv4.never-default no

nmcli -f connection.id,ipv4.method,ipv4.addresses,ipv4.gateway,ipv4.dns   connection show "$CON"
sudo nmcli connection up "$CON"
Cloud images may have network profiles rewritten by cloud-init or provider agents. Check image policy and provider documentation before modifying profiles with nmcli.
Verify Addresses, Routes, and DNS
A successful command message does not complete the change. Check link state and addresses first, followed by the default route, gateway reachability, DNS resolution, and actual service ports.
nmcli device status
nmcli -f GENERAL.STATE,IP4.ADDRESS,IP4.GATEWAY,IP4.DNS device show ens192
ip -br link show ens192
ip -br address show ens192
ip route get 192.0.2.1
ping -c 3 192.0.2.1
getent ahosts example.com
ss -lntup
Rollback When Something Goes Wrong
The following recovery example also assumes a NetworkManager-managed connection. With legacy network-scripts, restore the backup and apply it with ifdown/ifup for the target interface from the console.
Restore backup files from the console, reload profiles, and bring up only the target connection. Before overwriting anything, preserve the failed configuration in a separate folder for later diagnosis.
sudo cp -a /etc/sysconfig/network-scripts   "/root/network-failed-$(date +%Y%m%d-%H%M%S)"
sudo cp -a /root/network-backup-YYYYMMDD-HHMMSS/network-scripts/.   /etc/sysconfig/network-scripts/
sudo nmcli connection reload
sudo nmcli connection up ens192
Migration Checklist
Follow a simple sequence: back up all current configuration, verify console access, modify only the target profile, test a new SSH session from a separate terminal, and complete migration to a supported Linux release.
- Secure console or remote management access and a pre-change backup.
- Record interface names, IPs, prefixes, gateways, DNS, and static routes.
- Check for duplicate IPs and competing default routes.
- Apply only the target connection while keeping the existing SSH session open.
- Verify a new SSH session and application health checks.
- Keep the CentOS 7 server isolated while migrating to supported Linux.
Official Documentation and Related Articles
- Red Hat: RHEL 9 networking and NetworkManager
- CentOS Linux end-of-life notice
- CentOS 7 Vault Emergency Recovery Guide
- Rebuild and Migrate CentOS 7 to Rocky Linux
- Rocky Linux Installation and Initial Security
The procedure is more than copying one configuration file. Identify the active network manager and recovery path, change only the target connection, and validate addresses, routes, and DNS layer by layer. For an unsupported server, complete the migration plan as well as the immediate network repair.